
Last year, LEGO made the season bright with Mr. and Mrs. Claus, the 2018 design for the winter seasonal BrickHeadz. In our review we felt Mr. and Mrs. Claus was one of the best combo BrickHeadz sets released to date.
That’s a hard act to follow for the 2019 winter seasonal BrickHeadz, the triple-pack of Reindeer, Elf, and Elfie. Will they stand up to the test? Let’s find out.
The set
The set comes with 281 parts. The box packaging is identical to last year’s set (except for the set pictures of course), with a green background silhouetted with a Christmas tree and a row of black bricks across the bottom.

Last year, Mr. and Mrs. Claus had the “punch through” hole for opening the box. This year, the box is taped shut at the side. If don’t like destroying your box by sticking your finger through the back of it, this is a welcome change indeed.

The set comes with two bags. Bag 1 is for Elf and Elfie. It has plenty of red, green, and white bricks, plus tan bricks that will be used to build the headz. Bag 2 is for Reindeer and his display stand. Brown is the primary color here, with some white and red scattered in plus the standard gray SNOT bricks for the head.

Two instruction books are provided with the build. Elf and Elfie are together in one book, while Reindeer has his own. Because the set comes in a larger box than a standard BrickHeadz set, the instructions were not folded over in the middle, making them easy to use.

Since Elf and Elfie come together in bag #1, I’ll start with their review first.
Elf
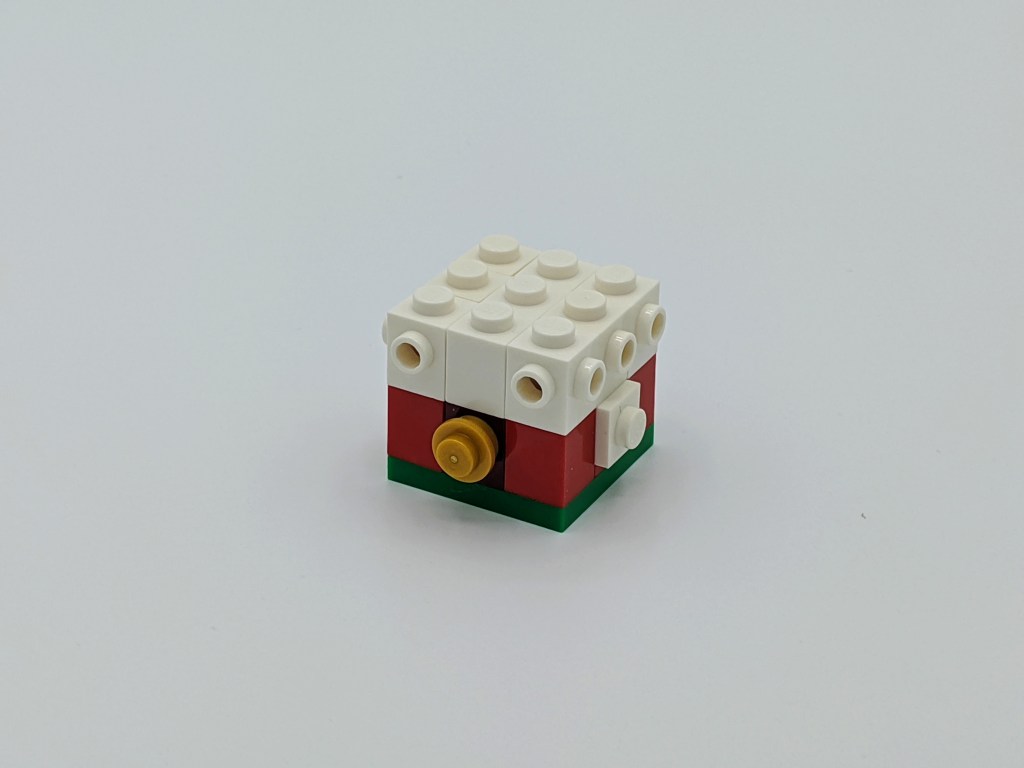
I haven’t built a 3×3 BrickHeadz since Hedwig the Owl back in 2018, so I was looking forward to comparing this build to the standard 4×4 BrickHeadz design. Elf begins with a 3×3 green baseplate, then a layer of mainly red bricks to start forming his torso. A gold round plate is used for a button in the front, and a layer of SNOT bricks is then added to begin laying the framework for the head.
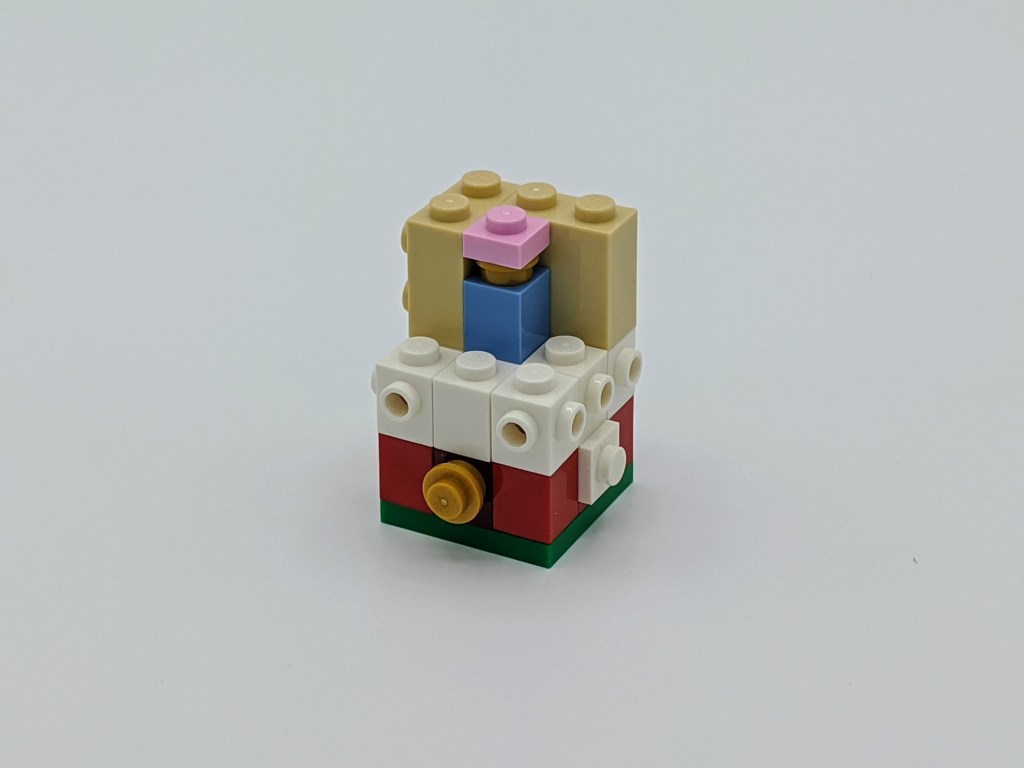
The next layer continues the internal structure for the head. It uses the saame 2×2 SNOT bricks as the standard BrickHeadz design but with tan bricks instead of gray.
I need to take a moment to discuss the issue of Elf’s brain. My wife and I were very upset that the brain is so small, using only a 1×1 plate. We feel this is an insult to the intelligence of elves. Elves are smart because they design and build all the toys, and therefore they should have a much larger brain. This could have easily been corrected by using a 1×1 brick, rather than a 1×1 plate, for the brain.
The build continues in the standard BrickHeadz manner, constructing the face next and then working around to the left side of the head. Before I began, I was worried about how the eyes would appear compared to the smaller BrickHeadz body. But like many things in this set, the actual build works better than the box photos would suggest.
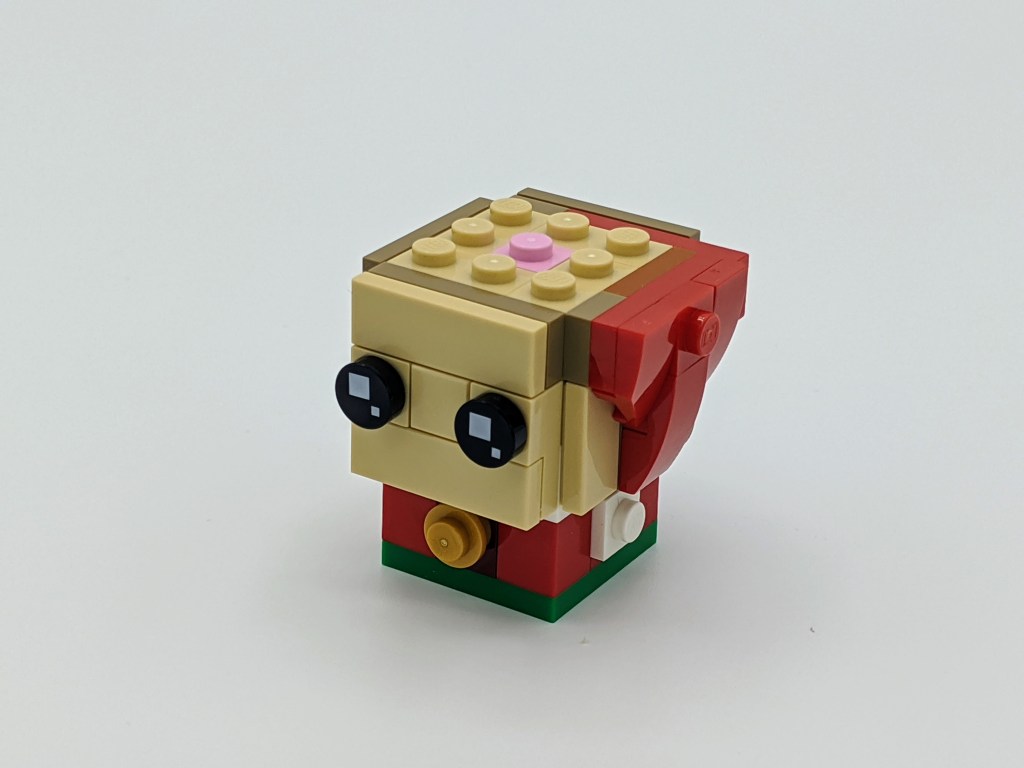
You can see the beginnings of Elf’s cap on the left side of his body, but the next step spins around to the back of the head to add three sand yellow 1×3 tiles for his hair, and also a 4×4 red plate on the top of his head to continue building his cap.

The build finishes out in routine order – flip him over to build the legs (I loved the use of two white 1×3 w/2 knob plates to center his legs on the frame) and add the arms, and then flip him upright again to complete the right side of his head. The finishing touches go quickly by adding four corner bricks for the cap.
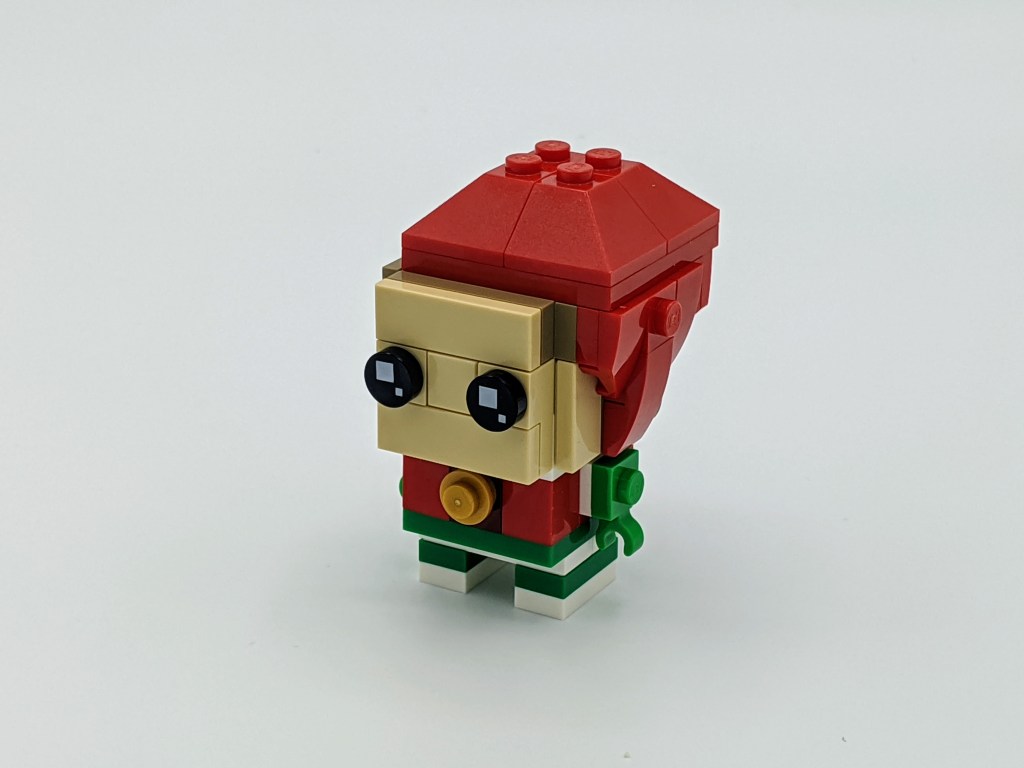
The finished result is better than I expected. The use of red, green, and white blends well throughout the design, and the gold button on the front adds a prefect splash of extra color. On the downside, the offset cap does not sit well with me. It feels more like I made a mistake in the build than a purposeful design choice. And like Mr. Claus from last year’s BrickHeadz set, it may have worked better to design the cap using curved bricks rather than angled bricks.
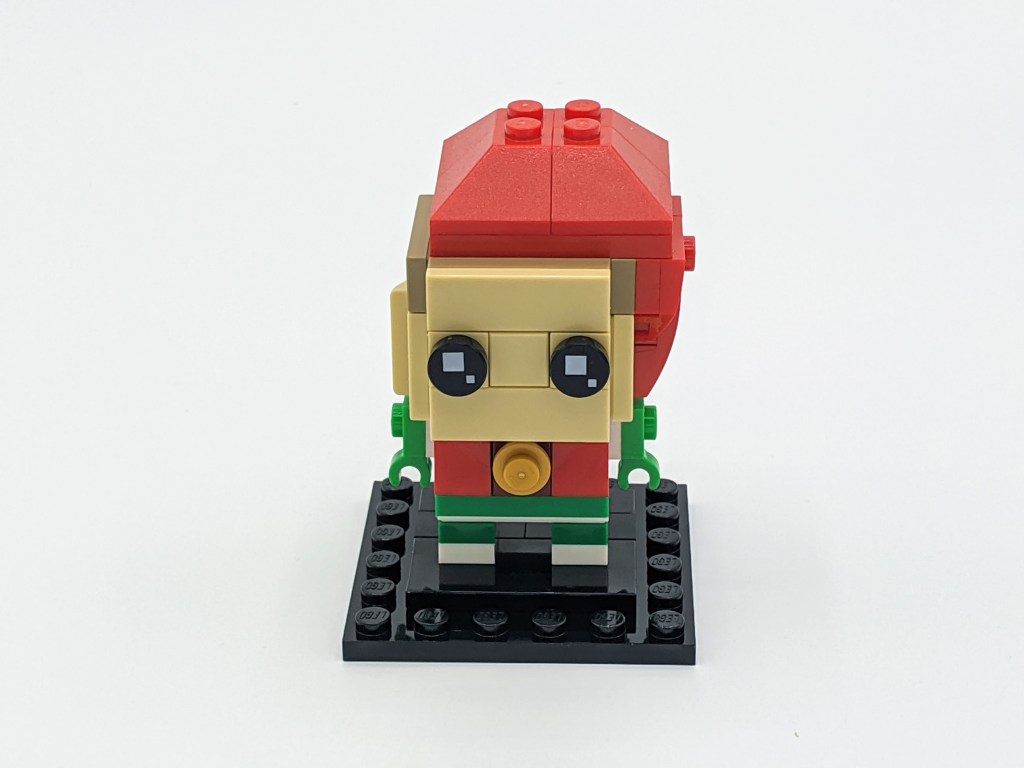
And that poor little brain. Elf deserves better than that.
Elfie
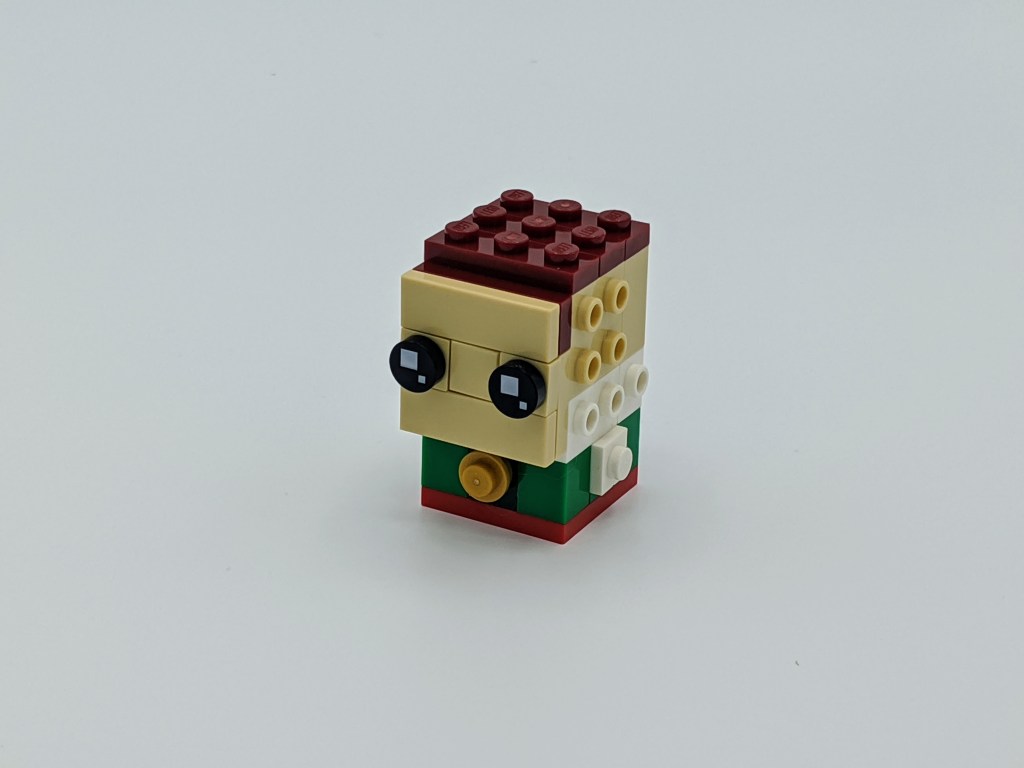
Next up in bag 1, and following in the same instruction booklet, is Elfie. Elfie starts off in the exact same manner as Elf, except the red and green bricks are reversed.

The design for the head continues in the same manner as Elf, including the disappointingly tiny brain.

Next the build continues by adding on the face. You can also see the beginnings of Elfie’s “new dark red” hair.
Moving on around the left side and back, curved bricks, angle plates, and 1×3 tiles are used to continue building out her hair.
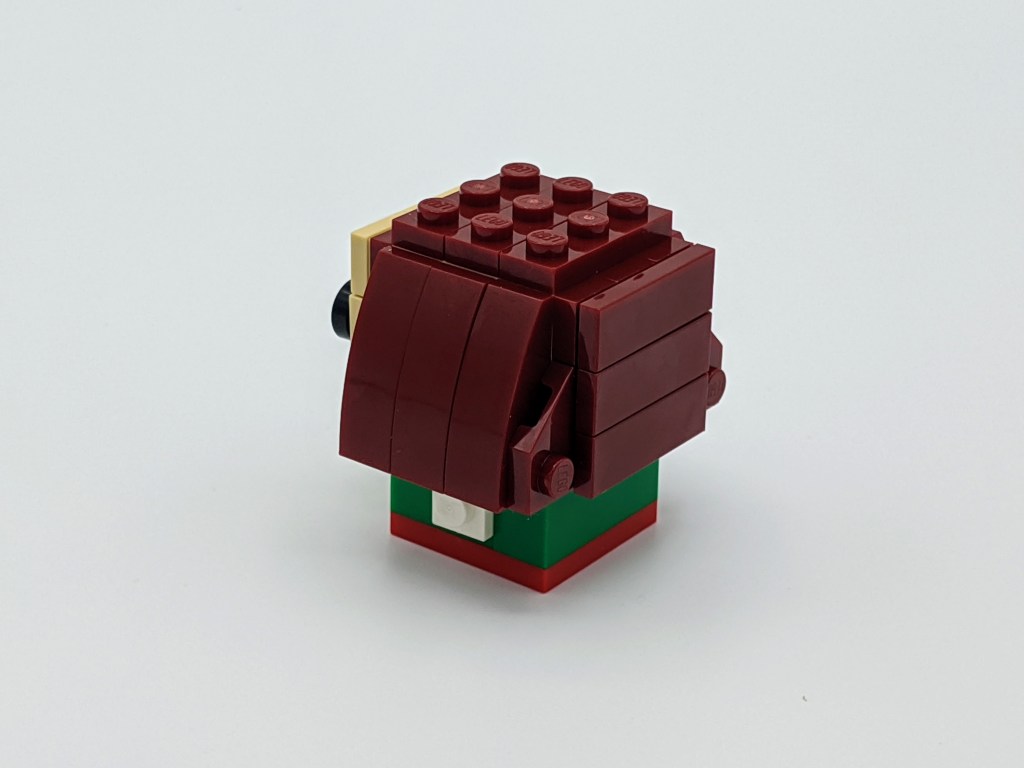
As with Elf, the build then flips her upside down to add the legs and arms, and back upright again to complete the hair on the right side of her head. A green cone with a red round plate and white ball completes the hat for her head.

While Elf and Elfie are very similar in design, I’m giving the edge to Elfie. The bob-style haircut looks great for the smaller BrickHeadz size and the upright hat – placed symmetrically on her head, thank you – works better than El’s flopped-over cap. Elf gets the edge on color, as the red-on-green stands out more than Elfie’s green-on-red. But overall, I feel Elfie is the better build.

Reindeer
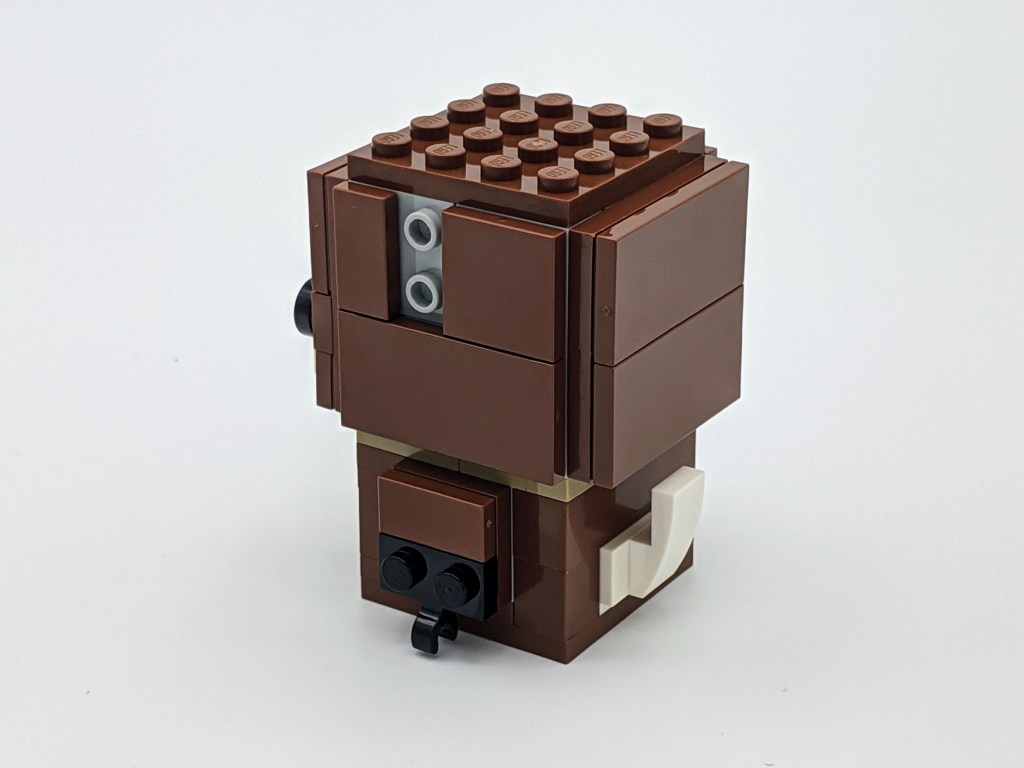
Now on to the largest build of the set, the Reindeer. Reindeer begins with a 1×4 arch on the front of his torso. This will be filled in much later in the build. The arms and hands are also added at this early stage of the build.

The next series of steps builds up the framework for the head. It’s pretty routine Brickheadz style here, with two rows of interlocking grey SNOT bricks wrapping around his brain and spine.
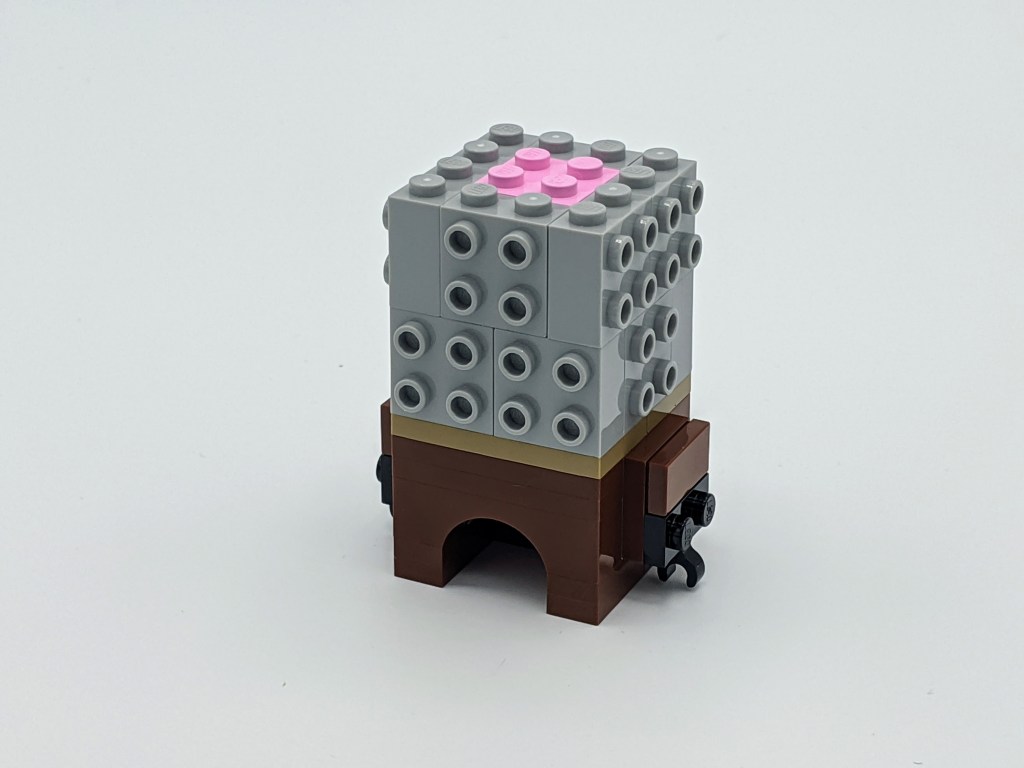
Next, the build moves on to the face. This is where I started to have some issues with the design. A 2×3 white “rock” plate is used below his head, presumably to represent a tuft of hair under the chin. But it just looks odd to me. From a different angle one could assume this to be many things different things, of which I won’t speculate here. I understand there are limited design choices when it comes to a 4×4 creation, but having this piece so close to where the Brickheadz’ mouth should be did not work well for me.

The build continues in standard fashion, moving to the left side of the head and then the back. Simple plates are used to cover these areas, leaving an opening that will later be used to add the Reindeer’s ear.
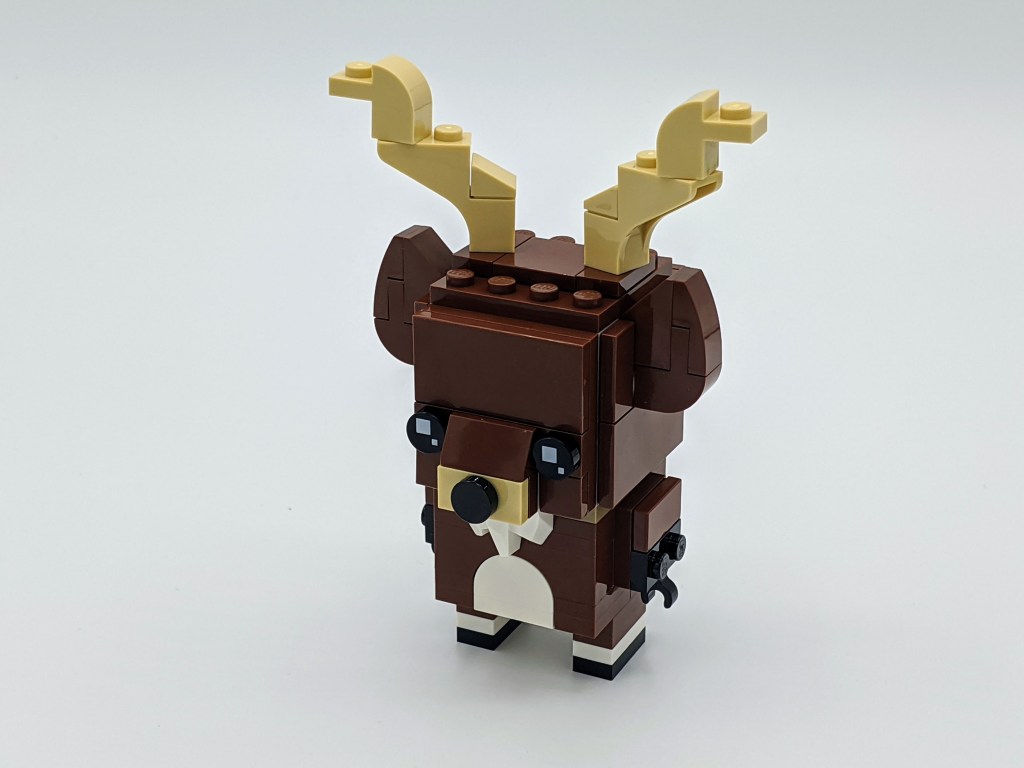
After completing the head, the legs are added to the bottom of the build. Also added at this stage is the bowed brick used to fill out the arch in the front of the torso. It snaps in place well and adds some much needed color to the design.

The final steps add the ears and the antlers. The ears seem to be a little large for the scale. Before the antlers went on, Reindeer looked more like a mouse to me, or maybe a dog as my wife suggested. And I know it doesn’t seem fair to be critical of something that’s purposely designed to have an oversized square head, but the antlers didn’t sit well with me either. It almost looks like when the Grinch tied an antler to the head of his dog in How the Grinch Stole Christmas. Even by BrickHeadz terms, it doesn’t look like an authentic part of the build, but rather something artificial tacked on to the top.
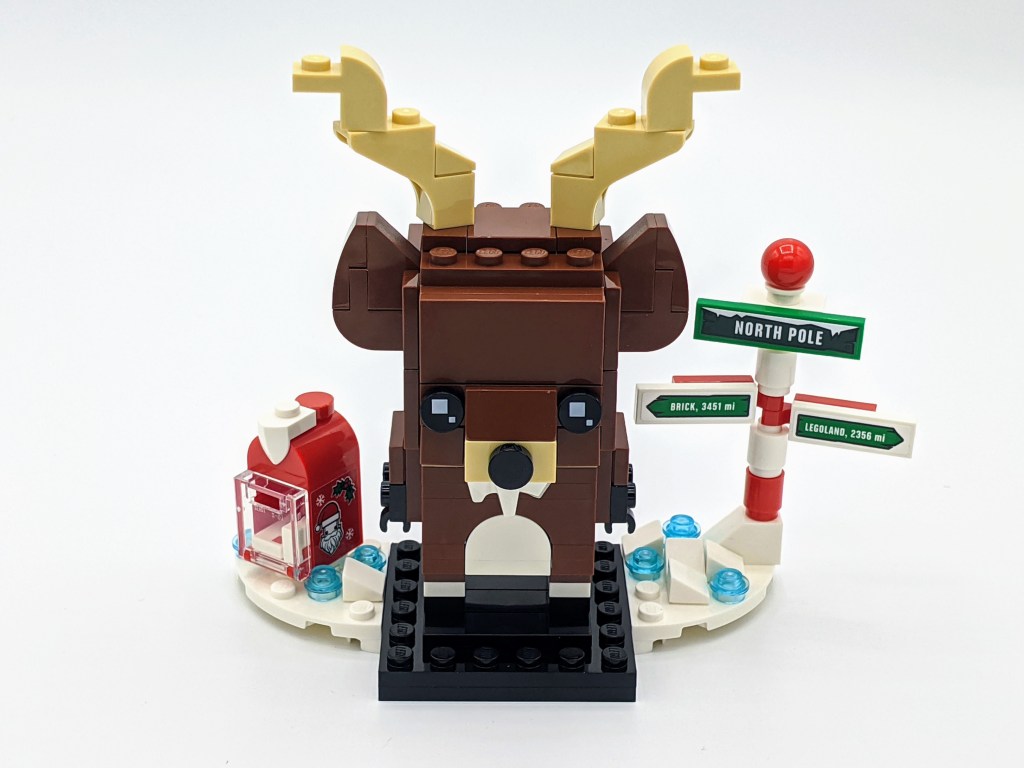
The final steps put together the base for the build. This adds some much needed accessories to the Reindeer. To his right is a red mailbox with two letters inside, and to his right is the North Pole with directional signs for “Brick” and “Legoland”. Five stickers are used here – two for the mailbox, and three for the signs.
Be aware that the “Brick” and “Legoland” stickers are provided in both miles and kilometers. A note in the instruction book would have been nice, as this is an easy detail to overlook.
As a side note, I was curious about the names and distances printed on the stickers so I decided to look them up.
Legoland – “Legoland” is printed as 2356 miles (3811 km) from the North Pole. The obvious choice for that is the home of LEGO in Denmark. Sure enough, the distance from the North Pole to Billund, Denmark is 2,368 miles (3,810.70 km). That’s pretty close to the target.
Brick – The second sign, “Brick”, is printed as 3451 miles (5554 km). The only “Brick” I know of is Brick Township in New Jersey, just a couple hours from my home. Drum roll please – the actual distance from the North Pole to Brick Township, New Jersey is 3,450.97 mi (5,553.80 km).
I’m sure I’m not the first person to look that up. But kudos to LEGO for once again providing us with a clever Easter egg.
The verdict
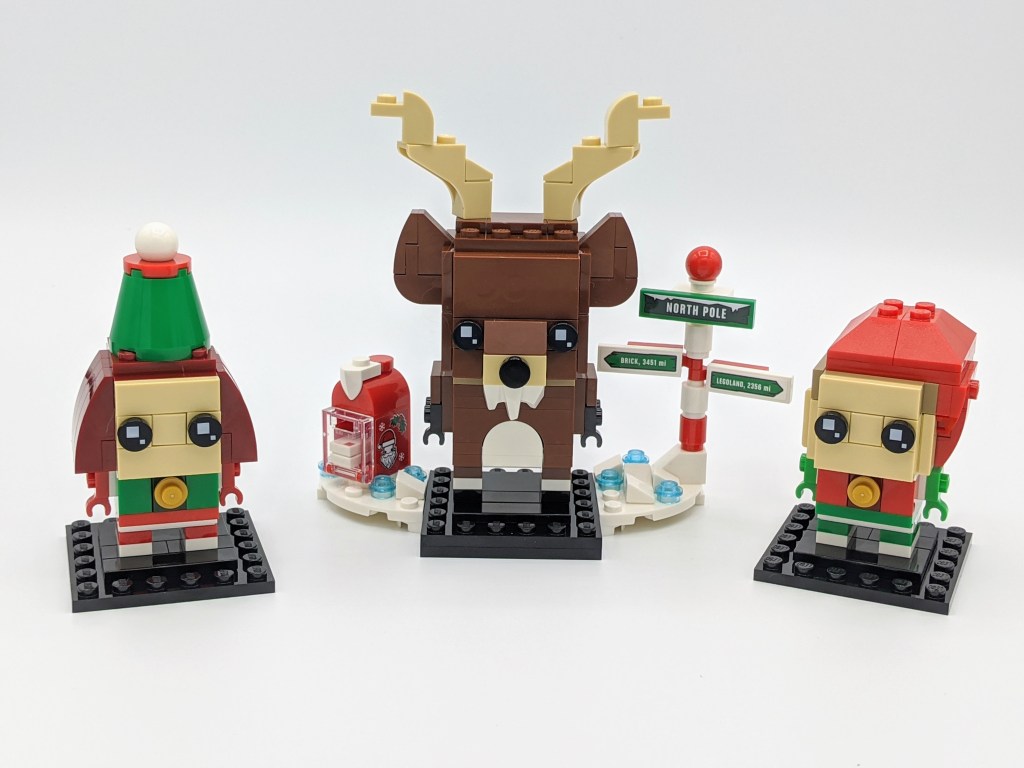
Did Reindeer, Elf, and Elfie turn out better than we expected? The answer is a lukewarm yes.
Reindeer still doesn’t look like a reindeer to me. Granted, antlers and big ears are a difficult thing to build out of LEGO. And the BrickHeadz style is not exactly known for being anatomically correct. But overall the design just doesn’t hit a home run for me. If you remove the antlers, one could easily assume this is any number of different animals.
However, Reindeer does look better when he’s placed on his display stand. I’m especially fond of the simple but perfectly designed North Pole sign, with its playful stickers pointing the way to the real locations of “Legoland” and “Brick”. The red mailbox and even the white cheese slopes and transparent light blue studs used to form snow and ice on the base help give a needed splash of color to the set.
Elf and Elfie are good compliments for the Reindeer. The small 3×3 BrickHeadz style works well in this case, although we’re still bothered that LEGO gave them such tiny brains. Otherwise, they help add to the festive atmosphere of the build.
Bonus note – my alternate build
I’m not sure if this qualifies as an alternate build, but take the spare 1×1 red tile from your leftover parts and swap it out for Reindeer’s nose. Now you have Rudolph.


Pingback: Review – 40379 BrickHeadz Valentine's Bear – BrickGeekz Blog
Hi Gary. Maybe the brain of Elves is too small but they compensated giving them a heart of gold if you check the pieces used for the interiors 😉
As an “alternate” built I swapped the ball at the top of the North Pole and used it as Rudolph rounded red nose.
Cheers!
LikeLike
I used the spare part 1×1 red round tile for the nose. That way I could keep the North Pole as it is and still have a Rudolph. Happy holidays!
LikeLike